Wednesday, January 18, 2017

WIP's - Bags, Secret Cross Stitch and a UFO!

Hello Dear Reader,


A Very Happy New Year to you, and "Welcome" to any new readers!


I'm afraid I got out of the way of visiting and commenting over Christmas, but I'm hoping to catch up with everyone very soon!

**********

Today I'm linking to Esther Aliu's - WIPs on Wednesday.

*********

On my last post I told you about this bag I made my sister for her birthday.

My sister's bag
Sis's bag

Before I'd even finished making hers I was already planning one for myself!

This is now my main WIP, but I know its going to take a while as I put myself under a lot of pressure to complete my sister's for her birthday, and that pressure isn't there for this one, with no deadline!

My fabric choice
This is the fabric for my bag.

I had the main fabric ready at least a week ago, but then I had problems stitching the handles, although they are ready now ..... and yet again I forgot to cut the fabric for the handles on the bias! 

I have since found a great tutorial for handles on a blog called SEW FEARLESS, from Pinterest. Looks really easy! Must try it out on my next bag!

Then I wanted to Free Motion Quilt (FMQ) the front of the bag to the interfacing but I didn't have a darning foot for my machine ..... I looked on line, and decided to buy one from Singer. Whilst I waited for a new darning foot to arrive I stitched my main fabric with a few meandering lines.

I want to make a large pocket  - for knitting patterns, etc. and then I can complete the bag.

At a later date I'd like to make a pencil case or pouch to match.

*********

Like most crafters I always have more than one project on the go, as there are times when I am happy to sit at the sewing machine, but in the evening I like to be able to sit watching TV and either work on some hand stitching or some knitting.

And so another WIP, at the moment, is some cross stitch I started last week. 

Jo of Serendipidous Stitching is running her annual "Stitching Sweethearts" bloghop in February - you can read about it and sign up, if you fancy joining in - HERE!

Last year I linked in with one of my embroidery projects, however, as Jo's blog is mainly about cross stitch this time I've found a little cross stitch kit from a magazine I bought ages ago, which I thought might suit the hop, and I'm happy to say my stitching is going well! Here's a little peep:

Secret Stitching
"Secret" stitching!

I was visiting France Nadeau's blog recently where she is working some pretty cross stitch fruit (which you can see by clicking "HERE") which reminded me of this UFO I had tucked away in our bookcase - like you do!

France was working with six strands and I mentioned that for my project I had used three. It's hard to choose when you make your own fabric choice for a pattern, isn't it?

But, ooooh, I'm not sure if it is a UFO or whether UFO's are so called when the stitching is done and they just want to be made into something? What do you think?

Rosebud
Pattern from Jane Greenoff's book "55 Country Cross Stitch Charts"

Well, I really need to get stitching now and cross some of these projects off my "lists"!!!!

Thank you for visiting, and I love to read your friendly comments.


Hugs,
Barbara xx


Btw, I've now received my new darning foot, and some Magic Bobbin Genies (to hopefully stop the bobbin jumping about when I'm stitching and causing those maddening bobbles under the stitching), and I'm looking forward to testing my FMQ skills ..... soonish!!!!


Of course, as always, any products mentioned in this post are my own choice of products, and I am not being reimbursed for mentioning any of them!


Friday, December 30, 2016

Finish It Up Friday - Tiny Tote and Mini Xmas Tree

Hello Dear Friends,

I didn't want to show you this bag yesterday before I had given it to my sister ..... didn't want to spoil her surprise! She received her presents later in the day, yesterday, so now I can share with you!

I am also linking to Amanda Jean's "Finish it Up Friday" ..... it's a great party, lots to see! Amanda is showing a particularly cute quilt finish today too!

**********

A couple of days before Christmas I decided to make a "quick" gift bag for my sister's birthday, and I just happened to have two fat quarters, the patterns of which I thought she'd like.

A couple of years ago I found a tutorial for a "gift bag" by Buttonberry, via Pinterest. Click HERE to see their tutorial. At that time I wanted to make something to hold a scarf for my mother, but I decided the gift bag would be more useful with handles!

As mum uses her bag most days .... to hold her knitting .... I thought my sister might like a similar one! (Mum's bag is at the end of this post.)

For my sister's bag, I made a few more changes ..... as she too knits a lot ..... I thought it would be rather nice, if, as well as having  handles, the bag could have a pocket for those tiny items knitters need, and one pocket divided into two for pens, or for her DP knitting needles, and I added a flap to help stop her wool jumping out as she knits!

Tiny Tote
No buttonhole on this baby! I just stitched the "homemade" button directly onto the
flap. The weight of the button (although it isn't particularly heavy) keeps the flap down.

Tiny Tote - inside pockets

Interfacing for Tiny Tote

I usually use polyester wadding but thought interfacing would be more suitable, making the bag nice and light, in order to enable my sister to knit with the bag on her arm.

Tiny Tote in progress

Tiny Tote in progress

Tiny Tote - Bagging Out
"Bagging Out"

Tiny Tote - Could have stopped here!
A nice little "Tote" ..... could have stopped here!!!

But no, I like a boxed finish!

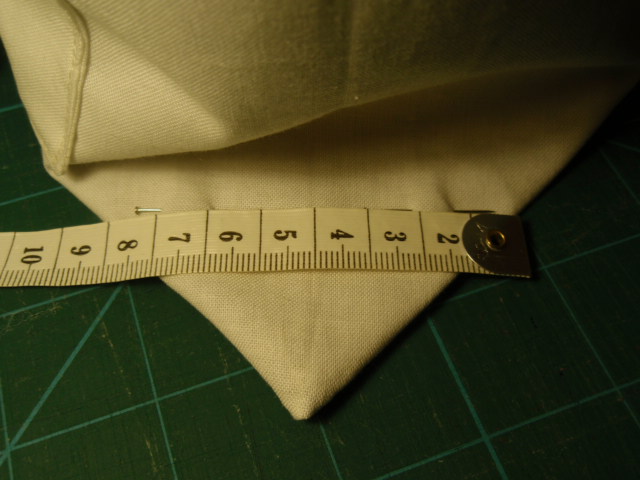
Measurements for boxing corners - Tiny Tote
The shorter the measurement here, the taller the bag.

Tiny Tote - Boxing the corners
"Boxing" the corners.

Finishing boxed corners - Tiny tote

Tiny Tote - inside view, boxed corners finished
This has to be the best seam closure I've ever stitched!

Reverse of flap

My sewing machine really behaved itself this time ..... lovely neat stitches and no bobbling ..... which was just as well because I was racing to finish!

Tiny Tote - My gorgeous bag with its Cherrywood button!
And, after telling you all about our cherry buttons in the last post, there had to be a button!

I was really pleased with the way this turned out ..... so much so ..... I had to force myself to give it away!!!! Now I want to make one for me!


I just found this photo of mum's bag. It looked different to how I remembered it, then I realised I have since changed the handles .....  they were too floppy ..... so I made wadded handles, and stitched them on top of the pink stripey handles!

Mum's Tote
The original bag .....  Alas, with floppy handles!

And here is the little tree I showed yesterday ..... finished!

Mini Xmas tree

Mini Xmas Tree - finished

The stitching was intentionally showing ..... to make it look more "prim"!

Mini Xmas Tree in progress
And this is the next tree in progress!

I'm getting into the swing of tree making now and can't wait to see how this fabric suits the tree pattern as it progresses.

Thank you for visiting today. Now don't be a stranger ..... see you again soon!

I hope you have a stitchy weekend!

Wishing you all a Happy and Healthy New Year!


Hugs,
Barbara xxx


Thursday, December 29, 2016

WIP - Christmas 2016/Secret Stitching

Hello!

Hope you have all had lovely relaxing Christmas, and I am sorry if some of you are back to work now!

*********

Today I'm linking to Esther Aliu's WIP - Wednesday. There are some lovely projects over there to visit, do have a look! I've just seen a link to a great tutorial for a binding kit for quilters (see no. 22 Tanya Quilts) although I'm sure it would suit other stitchers too! Oops, sorry, hope you don't mind Esther, I'm a little bit late.

Just before Christmas, my blogging friend .... Mary Anne of Magpie's Mumblings ..... led me to the blog of Ann Wood ..... where Ann was making woebegone pine trees, and Ann very kindly gave a free PDF pattern for the tree! And, as is often the way ..... I just had to make one. Yes, I know its too late for this year, but at least I'll have two little trees ready for next year!

Although, this was a little outside my comfort zone, as using glue, a sharp knife, and branches were involved! Well .... OK ..... only a little outside my comfort zone, I like the idea of  making buttons from the pruned branches of the cherry tree in our garden ..... but I have to admit I couldn't make them without DH doing most of the work - I can't use a saw, or burn the holes through the buttons ..... I can polish the buttons to finish them though! Oh, but maybe not for too much longer ..... as sadly the tree died this year! I don't think it's due to oversevere pruning ..... ie button making .... the tree was here over 30 years ago when we moved in! Looking on-line, the life expectancy of an ornamental cherry tree is between 15 and 20 years, depending on local conditions, and we can have some very hard frosts here, so it hasn't done bad!

Very kindly DH scouted round the garden and was able to find suitable twigs and branches for my tree .....

My "Woebegone tree"

..... but .....  how unusual ..... I have been distracted by another idea!

This one is a little bit secret ..... I'm excited to show ..... and can't resist showing at least one picture!

Secret stitching

I aim to have a finish tomorrow ..... gosh, must get stitching!!!!!  and hope to show it then!


Hugs from 
Barbara xxx