Wednesday, December 30, 2015

Crewel Work, Christmas Cross Stitch, and Knitting

Hello my friends,

I trust you have all had a thoroughly enjoyable Christmas.

I'm linking to Super Mom - No Cape's Vintage Embroidery Monday & Stitchery Link Party


**********

Crewel Work


This is a semi finish, and I do feel like dancing, having made it thus far!

I was intending making this embroidery into a cushion, and was going to use some blue velvet as a border around it ..... thought I knew exactly where the velvet was ..... and then I realised that in the summer we had had a clear out ready for decorating, and what happened .... I gave that piece of fabric away! Doh!

Now I shall have to think again about what to use to make my cushion!
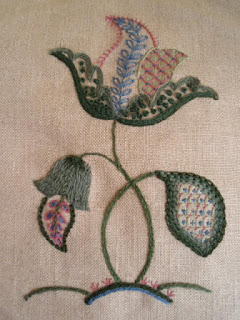
Finished flower!
Finished!
Little flower finished too!
I really struggled with this, and I don't think
it is quite right,but I'm happy enough with it!

Main flower head

You can find details of stitches and more
 in my previous posts filed,
strangely enough, as "Crewel Work!"

This was a project my local handicraft group were working on, and I hadn't initially intended to join in! However, once I started I became happily immersed in my stitching, so much so I have 3 books on the subject currently sitting on my coffee table - one library book, and two books that were recommended by Mary Corbett of Needle'n Thread. I have talked about Sheila Armour's book previously.  The second book Mary reviewed was  Crewel Embroidery in England by Joan Edwards - click on the link to see Mary's review.  I haven't had time to read the book thoroughly yet, but even DH was impressed with the historic information it contained!

I hope that wasn't too much information - once I start I can't stop!

**********

Christmas stitchery
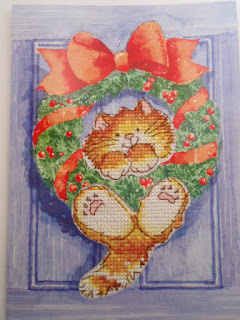
I stitched these cross stitch pictures a while ago, but as I haven't shared any cross stitch for a while I thought I would feature these pictures today:

Margaret Sherry pattern.
A Margaret Sherry pattern from
CrossStitcher magazine
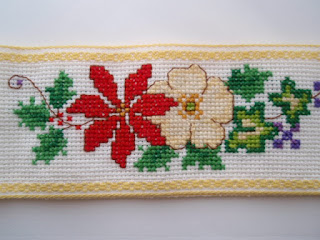
Cake band.
My cake band awaiting its cake....
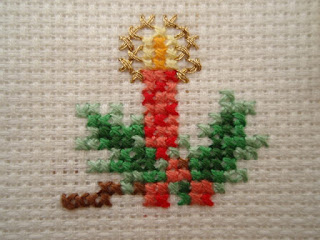
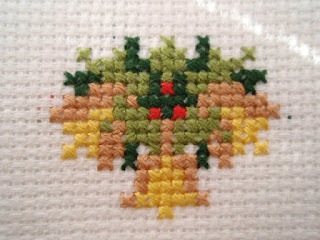
I will probably use the following two for Christmas cards next year.
    Christmas card picture.
    Second Christmas card picture

**********

Knitting

Plus, I'm sure you have noticed, I like variety, and have started working on  a new project!

Unfortunately I spotted this wool on our recent trip to the local stitching supply shop, and I couldn't resist buying it as I really needed a new waistcoat.
Recent wool purchase -  Kiko by Sirdar.
The wool looked so pretty, I couldn't help but buy it!
Kiko by Sirdar.
The colour in the photo is not strictly true to life, but it is close enough!

**********


Did you do any crafting over Christmas? ?


BTW: Don't forget to visit Super Mom - No Cape's Stitchery Party to see what others are making.


Thank you for visiting today, and I wish you all a Happy and Healthy New Year.

Hugs!


Barbara xx


Thursday, December 24, 2015

A lovely surprise!


Hello Dear Readers

Last Saturday Darling Hubbie and I had to go out shopping -  I needed more white embroidery thread to finish my Christmas stitchery (which is still not finished unfortunately!) and while we were out we went to a lovely little Tea Room (eBear's Attic Tea Room & Charity Boutique) a few doors away from the sewing shop!

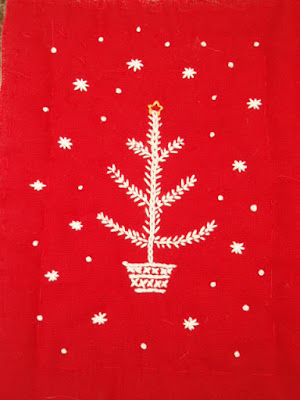
Embroidered Christmas Tree
For anyone who may not have seen my tree
 before this was stitched from a pattern found
 on Super Mom - No Cape's blog


It was hard to find somewhere to sit, it was so busy. They make such lovely lunches, snacks, and treats, and people get there early to eat the wonderful jacket potatoes!  We had to settle for toasted sarnies which are also delicious, but I had really wanted one of their jacket potatoes - they are cooked properly in the oven, not in a microwave!

While we were there we bought some raffle tickets. We didn't consider that we might win, we just wanted to put some money into their funds as its for a charity - aadc research trust, for children with a rare brain disease (we had not heard of the charity before but their website explains in detail about the very worthwhile charity). We knew the raffle would be drawn on Tuesday, and we were really surprised when later we had a message on the answerphone to say we had won their gingerbread house.

The following day on collection of the gingerbread house the staff told us that other people collecting their prizes had asked if they could have the gingerbread house in place of what they were offered.

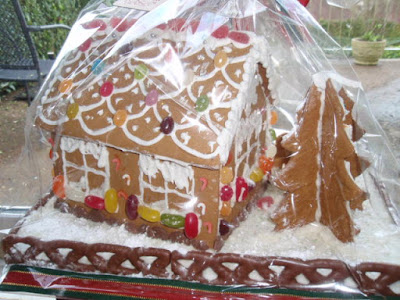
We were totally impressed with the size of this homemade gingerbread house, and couldn't believe how incredible the detail was in its creation.  Even the boundary fence around the garden is a lovely chocolate covered toffee.  However, we have so far resisted nibbling at it.

The gingerbread house is approximately 12" wide by 15" long and approximately 11" tall, and was quite heavy to carry!

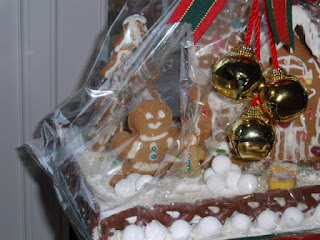
Gingerbread House
Its a gorgeous cake, but it was difficult to picture it properly.

Gingerbread House, view 2
I wanted to keep the cover on it to protect it,
but that did make it hard to photograph

Gingerbread House - view 3
The cow bells are really pretty, and surprisingly heavy!

Gingerbread House, view 4

Gingerbread House, view 5
The back of the house.

Gingerbread House - View 6
Trying to show the side of the house a little better.

Our new front door!
Just a quick picture of our new front door,
with our first ever Christmas Wreath!

It only remains for me to wish you all 

A Very Happy Christmas!

I hope you all have a super time!

and I look forward to seeing you all again in the New Year.

Hugs!

Barbara xx


Wednesday, December 23, 2015

Winter Solstice Plus 1 Day!

Hello Friends, old and new, alike!

Thank you for popping by to see my little blog.

Don't be alarmed or shocked - yes, I have changed my header!

I hope the picture quality is clear enough for you to see it properly.

Is it my imagination, or are the days drawing out already? This picture was taken at 16.24 today.

I send you Seasons Greetings and I hope to post again, this side of Christmas!

Hugs!

Barbara xx


Monday, December 14, 2015

Mid-December stitching

Hello Dear Readers,

I'm sorry I've been quiet for a while!

I meant to post last Monday - but missed my deadline!

Then Tuesday I found I couldn't get warm all day no matter how many heaters we had on, or sweaters or blankets I wrapped around me! By Wednesday I found out why! Without going into too much detail I have been suffering with the winter tummie virus, so I trust you all have your anti-virus programmes switched on, otherwise you might catch it!!

Truthfully, Darling Hubbie has suffered most, as he has had to take over all the shopping, cooking and household duties, not to mention looking after our very demanding little madam cat!

For the whole week I didn't feel in the mood for sewing or for looking at the computer screen for more than 10 minutes at a time - maybe I have that Cyber sickness I've seen reported in the news, too!

So this is what I had intended to post last week!

1.  Crewel Work - nearly there!
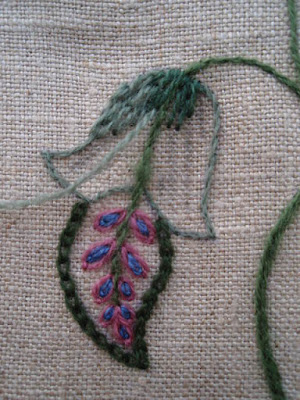
Crewel work flower - long and short stitch.
Chain, split and long and short stitch
It took me a long while to stitch this tiny flower. The chainstitch was fine but I hadn't stitched long and short stitch before and I really struggled to get to grips with it! I have since ripped out these stitches and restitched this part of the flower.

Then, one day last week, when I was laying in bed feeling proper poorly, I heard the post drop through our letter box onto the hall floor with a resounding thump - I was much cheered as I guessed the noisy object was the book I had been waiting for! And I am now the proud owner of a copy of Crewel Embroidery - A Practical Guide, by Shelagh Amor.

It is a little too late to help me with this flower, but I do have other ideas for Crewel work in the future.

2.  Patchwork Mini Thread Catcher:
Quilting my mini thread catcher.
A little bit of quilting! This is masking tape, easy to remove,
and easy to stitch alongside.

Quilting - close up.
Not perfect, but I do love quilt lines!

3.  My Christmas project::

I was really pleased when I saw this lovely Christmas Tree was one of Super Mom -No Cape's Vintage Stitchery PDF's. I haven't stitched all the branches from the original pattern, as I was going to add some Christmas Decoration buttons - unfortunately the buttons are a little large for the tree so I am not using them.

tree - DMC 6 strands
I used DMC blanc in 6 strands
For those who don't quilt, the safety pins are quilting safety pins, for basting. I probably bought them about ten years ago, so maybe everyone is using adhesive now, I don't know, but I still use these and they do a good job.

removing tracing paper from Christmas tree
As my heat transfer pencil wouldn't be
visible on red (being pink) I traced the pattern,
in pencil onto tissue paper and stitched
over the pattern.
Tree - after removing stitches
I had forgotten how hard it is to remove
tissue paper from between stitches!
Tree with stars and french knots
Starting to add some french knots and
stars around the tree.

Thank you for visiting my blog today, and I hope you would like to say "hello" and then I can visit you too!

I'm linking to Super Mom - No Cape, why not pop over to see what everyone else has been making this week and see the lovely free Christmas PDF that Sue has for us.

Must dash, I'm off to write some Christmas cards!

Hugs!

Barbara xx


Tuesday, December 01, 2015

Crewel Work

Hello Dear Reader,

Thank you for popping by.

I have spent some time since last week completing the main flower head, and now have the French Knots in the correct colour!

Flower head


Perhaps pale green wasn't the best colour to use for the grid on the second leaf - seemed like a good idea at the time!

Leaf and grid
Wasn't sure how to tackle this leaf,
but I stitched the grid first, and then
surrounded it with three rows of chain stitches 
Close up of leaf and grid
A little closer!

Then I hit a stumbling block on the last flower! 

Shelagh Amor's picture, which is guiding my stitches, shows Long and Short stitch, on the bell shape flower, which I want to try out but can't quite fathom how!

Shelagh Amor's pattern
Picture from Shelagh Amor's book

I know the theory but the photo I'm following appears to show the tiniest amount of shading at the top of the area to be stitched, and I just can't get my head around how to start. No doubt I will work it out. I've looked at many examples but they don't seem to be stitching in the same direction as my flower!

Last flower
Last flower: I stitched the outline in split stitch,
and embroidered pink chain stitches.

Having thought about this some more, and looked at yet another book on the subject, I have decided I will start just above the pink flower where it meets the lower edge of the bell shape, and I understand the stitches should slant towards the stem.

Close up of last flower


Apart from my crewel work I have managed a few stitches on Izzy's dress:

Izzy's dress
This is part of the dress I am making for my doll (Izzy).

I find I can't embroider without the support of a frame, can you? So, as the stitching was an afterthought, I had to use a picture frame to support the embroidery - just hoping I can iron the creases out after stitching!

I have also spent a few minutes on my thread catcher.

Thread catcher
It is a while since I quilted and I almost forgot I had
 these pins for basting!

That's all for now and I haven't even looked at my Christmas stitching yet!

I hope you would like to say "Hello", then I can visit you too!

Have a great week.

Hugs!

Barbara xx


Monday, November 23, 2015

A sunny morning made me do it!

Hello My Friends,

It was lovely to see the sun again today!

It is very chilly here now, as we in England are starting to get some proper winter weather.

Saturday morning we had the forecast heavy snow, it even settled for a while, but then the snow turned to rain and was gone by mid-morning!  By early evening the ground was frozen solid and the next morning DH had to run out and pour hottish water in all the bird baths to thaw them out. At lunch time we had sunshine, but it was definitely REALLY RAW COLD!

Anyway, my point was "the sunny morning made me take some photographs to show on my blog".


**********


I am again today joining Sue of Super Mom - No Cape for her Vintage Embroidery Monday and Stitchery Link Party.

This week I have three projects I am trying to work on:

Patchwork:


I am sure it will come as no surprise to anyone who crafts, to find out that I am easily sidetracked.

I have recentky started this little patchwork project!

I "inherited" a package of patchwork squares, the sides of which are 1.5", and I am often thinking up ways of using them. This is a little hand stitching project. I haven't used my sewing machine yet, but it will have a frill around the top, which I will machine stitch in place.  There will be some hand quilting - yet to be stitched.

Finished patchwork purse and thread catcher in progress.
The little purse in the backgound has been lurking
 at the bottom of my blog for a while and I thought it
should have an outing as a finished item!

2nd side of patchwork purse and threadcatcher
2nd side of both 

I thought I'd make a tiny "thread catcher", but now I have decided it needs a pocket or two - to hold my needle threader, mini scissors, mini tape measure, and, maybe a mini pin tin.  A mini pin cushion would be handy too!

Could be, this will take a few weeks yet to stitch .......


**********

A Christmas project:


I have been intending to make this red fabric (seen below) into a small Christmas bag, in order to carry a food tray. However I want to do some simple embroidery on it before bag construction commences.  I have now layered and basted the fabric ready for embroidering.  I just need to find or draw two small patterns to stitch. "Watch this space" as they say!

A Christmas project
A project for Christmas


**********


Crewel Work:


On a visit to our local library at the weekend I was fortunate to find  "The Stitching Book", by Search Press, which has articles on sewing methods written by eight different ladies, one of them being Kay Dennis with Stumpwork - which is something else I'd like to be able to do!

Not surprisingly my main reason for borrowing this book was because it has a good section on Crewel work. I was so excited to find the book - it was the only one on Crewel embroidery I could find in the library that day.

One really useful tip I learnt was that the best way to keep track of the many differing shades of wool is to thread them through an embroidery ring, making them easy to distinguish from each other.


Organising the shades of wool
Organising the shades of wool. 

Since last you saw my Crewel flower I have outlined the lower petals with three rows of stem stitch and added French knots - unfortunately the knots on the RH petal have to be frogged - they were the wrong shade of green! Stitched before I discovered this wonderful "new to me" method of keeping track of the colours.


Latest stitching


I have recently found out that my flower pattern is from a book by Shelagh Amor.  I googled Shelagh and found a review of her book, "Crewel Embroidery: A Practical Guide",  on Mary Corbett's blog. Mary's review persuaded me this is a book I need to have!  If you read Mary's review you will see that Shelagh's book includes instruction on how to design your own pattern and this sounded just what I wanted - as I don't like using someone else's ideas/designs! I have ordered the book from Amazon and it is now winging its way, from the USA, to me! (I feel I need to point out I have no affiliation with Amazon, Mary Corbett or Shelagh Amor).


**********


Might I suggest, if you haven't yet discovered Super Mom - No Cape's Vintage Embroidery Monday and Stitchery Link Party, you really should pop over to see what everyone has been stitching. And Sue has another Christmas Vintage Embroidery Pattern to share this week!

Thank you all for visiting today, and for your lovely comments on my previous post, which are always much appreciated!

I love reading what you have to say, and being able to visit your blogs too to see what is going on in your world at the moment.

Hope to see you next week!

Hugs!

Barbara xx


Friday, November 13, 2015

Fungi Hunting

Hello My Friends,

I am joining Amy's "Five on Friday" today.

If you are new to my blog I would like to explain that in a recent post about My Favourite Pouch I mentioned that Darling Hubbie, our neighbour, and I went on a "Fungi Hunt" with a fungi expert, a City of London Commons Ranger, and a like-minded group of people a few weeks ago.

On that earlier post I showed a couple of photographs of the fungi we saw on that walk, and today I would like to share some more!

Shaggy Parasol
I think this was a Shaggy Parasol!
One

This is where our walk began! 

We gathered at this entrance to the Common, and, as I doubted the people on the walk would want their photographs displayed on my blog, this photo, taken a few days later, shows our meeting place and start of our walk. And, no the sweet little cat did not join us on the walk!

There were plenty of fungi to see, and these pictures are just a few of the more unusual ones. I can't promise I have the right names, I jotted them all down as we all walked and talked, but things moved fast, and there were many fungi to be seen, and lots of people chatting at the same time.

At the end of the walk our expert estimated that we had seen approximately 50 different fungi - don't worry I'm not thinking of showing all of them here, even though some were really quite lovely!

Two - Fungi that kill trees

The fungi in the following two photographs are killing the tree they are growing under or upon, respectively.

Unknown fungi


Tree killer!

Dying tree
The dying tree.

Dying tree
The dying tree from another direction.
This tree is being killed by fungi! The tree is right on the edge of a bridleway and we were told it has to be regularly monitored, by the Rangers, for the safety of the Common's users. The fungi is attacking the tree's root system, but as the track which passes the tree has low usage this means the treatment of the tree is low priority as the chances of people being injured are slim. In the future the canopy of the tree will be thinned to take weight away, and hence reduce the chances of the tree being blown down in a storm.

Three - Waxcaps

I investigated Waxcaps on the web and found a very interesting link which informed me that  all these Waxcaps are sensitive to pollution and nutrients and  would disappear if the land is treated with chemicals.

Pink Waxcap
This is a Pink Waxcap which our guide told us was really rare!
Yellow Waxcap
Yellow Waxcap
Red waxcap
Young Red Waxcap
Four - Some miscellaneous Fungi!

Fairy club fungus
Fairy club fungus, also known as Apricot Club.

Sploge fungus
This is a very unusual lichen which is only found where
 there is very clean air, called a sploge fungus.

Birch polypore
Birch Polypore
Unknown fungus
Not sure of the name of this fungi - it could 
have been a relation of Snapping Bonnet
You will need to click on the above photograph to see it better, it is not just a mass of leaves, there are tiny white stalk-like growths - which are fungi!

King Alfred's Cakes
Apparently this has a nickname of "King Alfred's Cakes"
or "Cramp Balls"
This inedible fungus has many intriguing names, such as King Alfred's Cakes or Cramp Balls or coal fungus (Daldinia concentrica), lives on dead and decaying wood, and especially on fallen ash trees, and indeed we found the fungus in a recently cut back clearing within the woods.

Woodpecker damage?
A discussion ensued as to whether the damage
to this tree was caused by Woodpeckers or not?

This next fungi is without a doubt the prettiest!

Crepidotus
crepidotus
Our guide named these fungi at the time of our walk but as she didn't spell the names out I jotted them down quickly and have since spent a very pleasant  evening looking them up on the web!


Five - Teachers Homework!

When quizzed our guide would tell us whether the fungi were edible or not!

Teacher's Homework!
And this is our guide's basket of homework!  She said she
 was taking them home to read up on these further.

I hope you have enjoyed seeing the fungi we found on our walk in the countryside!

We used to eat certain fungi that we were confident were edible, but recently we have become more nervous, and now we only eat the mushrooms we buy in the shop, but I'd much rather be able to grow mushrooms in our own garden!

Do you or would you eat fungi you found growing in the wilds?

Hugs,

Barbara xx