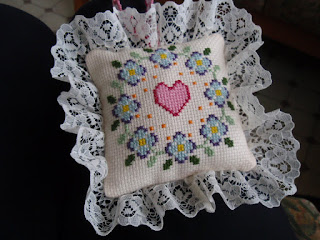
Yay, I have a finish!!!
You might remember when I finished making my Sister's Tote I immediately wanted to make one for myself! I showed you the colours I was using, but somehow, I got bogged down with the detail!
You've guessed it .... I couldn't resist the idea, could I ??!!!!!
**********
Fabrics Used:
3 Fat Quarters
1 Fat Quarter of Calico
Interfacing
Strips of Wadding for handles
Finished size: 23.5cm High
14.5cm Wide
9 cm Depth
Handles are 27.5cm long, and 1/2" wide
After prepping the main fabrics, I found the pieces I'd cut off the boxed corners of Sis's bag, unpicked the stitching and placed the squares on the bottom of the fabric, and gingerly cut them out! (Cutting the outer squares 0.25" larger than the centre oblong, bearing in mind the centre "squares" had no seam ..... if you see what I mean!)
 |
| You cans see the squares in the background! |
I made a pocket, and I was going to decorate the top of the pocket with a strip of one of the outer fabrics, but couldn't resist running a piece of elastic through the decorative strip .... well there was a gap .... so why wouldn't you add elastic? I do love pockets with elastic tops! I think it makes them so much cuter ..... and holds the contents of the pocket in place slightly better when the bag is in use!
As I machined the pocket in place, I stitched back and forth over the elastic to make it secure.
 |
| .... snipped off the elastic close to the edge of the pocket |
I remembered seeing a very useful idea on somebody's blog (and if it was you, thank you for that!) to use pins at an angle ..... then they can be removed easier when machining the seams!
It was a nice sunny afternoon when I started stitching, and our cats were in the garden when I started stitching ..... however, with these short winter days it was dark by the time I finished! I was determined to use the machine while I could (another day and the cats might have commandeered my stitching table, and then there would be no stitching!)
 |
| I always get confused here ..... about which way to stitch the corner! |
 |
| ..... see, I remembered how to pin it! Tee, hee! |
 |
| ..... but when I turned the bag through one corner didn't sit very well .... |
 |
| ..... and the frog visited! |
 |
| .... but with some fiddling ..... |
 |
| ..... and after a another row of stitching, when I ..... |
 |
| ..... turned the bag through to check ..... |
 |
| Yep! The bottom was much squarer this time! |
 |
| Pocket is 8"h x 7 1/2"w |
After a short search I was able to find one of our home made buttons for the finishing touch!
To summarise the Pros and Cons of "boxing" or "squaring" the base:
I found it quicker using the "boxing" method ..... mainly because I'm used to this way, but "squaring" the base probably is faster because the corners don't need binding on the inside to finish.
I found it quicker using the "boxing" method ..... mainly because I'm used to this way, but "squaring" the base probably is faster because the corners don't need binding on the inside to finish.
I do hope you've made it to the bottom of this post!
And if you have, thank you for reading!
Hope you are having a great weekend.
Hugs,
Barbara x
Linking to Amanda's "Finish it up Friday"


