Saturday, September 24, 2016

A Few Tiny Finishes!

Hello Everyone,

This week, we have had a very nice man decorating our hall, stairs and landing, so DH and I have been trying to keep out of his way.

Our cats have been a little put out! They just do not like having visitors here! Luckily the weather has been kind to us. It's been sunny and cloudy alternately, and we have been able to sit outside on our veranda, keeping the cats company!

However I did manage to get a little sewing done!

The Splendid Sampler

Yipee, I finished two blocks this week!

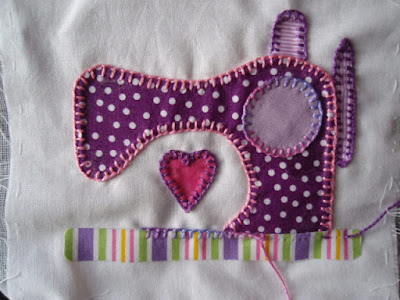
Block 27 The Sewing Machine by Pat Sloan
Block 27 - The Sewing Machine by Pat Sloan

And here are the views I showed you on my last post of my progress on The Traveller:

Working on "The Traveller"


More of "The Traveller"


And here it is finished! Although I'm afraid I took my photos too late in the day, and the light wasn't good enough so the colours haven't come out very well!

The fabrics used in this block are the same ones you can see in the header.


The Flashing Scissors - Block 61 The Traveller by Pat Sloan
Block 61 - The Traveller by Pat Sloan

Another Finish!

Last week I joined in with Ida's "Perfectly Pleasing Pincushion Parade" .....  which was loads of fun ......  with many "new to me" blogs to visit. I haven't finished visiting yet as I was also visiting Jo's Big Birthday blog hop.

When I visited Susie's Sunroom (via The Perfectly Pleasing Pincushion Parade), amongst her many tutorials I spotted a free PDF that she had written for a Mini Keeper! I had to make one, but I thought I'd make it a little bit patchwork!

The Flashing Scissors - Mini Keeper


The Flashing Scissors - Mini Keeper
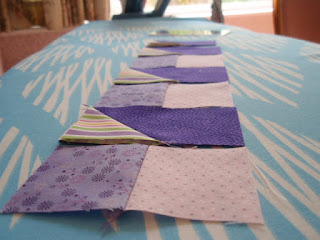
I started by strip piecing the front of my Mini Keeper

I used 3 strips 1 1/2" x 9" and one piece 3 1/2" x 9" for the back. 
Strap 3" x 22".

By the time I finished .... and after some trimming ..... my completed keeper finished at 2 3/4" by 8" .... a little shorter than I expected, but it worked out well for the size of my mini scissors!
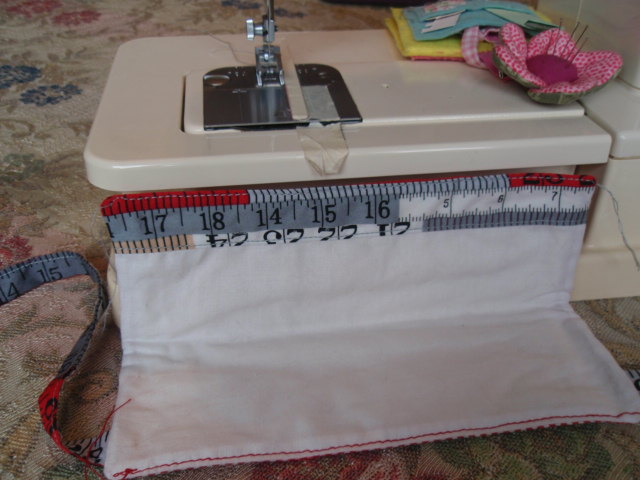
The Flashing Scissors - Mini Keeper
I like to use calico to line all my pouches, with a couple of inches of patterned fabric at the top where it will be
visible when the pouches are used.

Susie used Velcro to finish her ties, but as I have a surfeit of "inherited" poppers, and I don't really like  Velcro ..... it gets caught on so many delecate fabrics .... I used these vintage press studs:

The Flashing Scissors - Vintage Press Studs


The Flashing Scissors - Mini Keeeper
I used some of my "tape measure" fabric for the straps.

Have you been stitching this week?

What have you made?


See you later,
Hugs,
Barbara xxx

Linking to Crazy Mom Quilts for "Finish it up Friday"


Saturday, September 17, 2016

Jo's Big Birthday Blog Hop

Hello My Friends ..... Welcome.

If you haven't visited before, grab a coffee, sit down, and have a little read ....

Happy 50th Birthday Jo


Today Jo of  "Serendipidous Stitching" is holding a Blog Hop to celebrate her 50th birthday, and she has invited us, her blogging friends to join in!

Jo has given each of  us some facts about herself from particular years .... my year is 2011 - when Jo was 45, and she has asked that we give some detail about ourselves for that allotted year, and also to show some stitching we think she might like!

These are the facts Jo has given me of her life from 2011:

  • This was the year it all took off for Jo and her stitching!  In April, she took the plunge and started her own blog.  Earlier in the year she started a rotation of sorts and for the first time had more than one active WIP.  Jo was still very active on the stitching forums too, joining some Yahoo groups as well as the Yuku forums.  She also started the first of her very popular Blog Hops with the Christmas Advent Calendar.
  • As the music venue her husband had run had been closed for a while Jo decided to look for a temporary job over Christmas.  She asked a friend who managed a bookshop if there were any Christmas jobs going.  Jo's timing was perfect and there was a permanent ten hours a week; weekdays during school hours.  Jo applied for and got the job, starting a new career as a Children's Bookseller.
*********

In that same year I competed in singles competitions and won my Surrey County Badge for Bowls, and went on to play in team games for the county. In the picture below I was playing a singles club competition .... I seem to remember I came second in this particular game ..... you can't win them all!

This is me! (Barbara, that is!)

I don't play any more. I gave it up as my back was giving me a lot of trouble.

Here is a picture that I stitched that I hope Jo might like (I stiched the first picture too, in case you didn't guess!):


Tried to get a close up, but I'm not sure the detail is any clearer!
So, I hope you will all join me in wishing Jo every happiness on her landmark birthday:

Happy 50th Birthday

and don't forget to go over to Jo's blog to see who else is joining in today!

In case you were not visiting for the Blog Hop, I thank you for reading to the end of the post, and here is a taste of my next post .... "A couple of small Finishes" ....


Thank you for popping in!

Looking forward to seeing you all again soon. 

Hugs,
Barbara xx


Tuesday, September 13, 2016

The Perfectly Pleasing Pincushion Parade

Hi everyone!

Have you heard! Over at "My Sister Made Me Do It", (isn't that such a great name for a blog btw) Ida is holding a party, until 15th September!

It's the 2nd year of "The Perfectly Pleasing Pincushion Parade". There are some great pincushions to see ... go on, go and have a look, (well, after looking at mine, that is) and then maybe search out some pincushions of your own and join in! There are lots of prizes to be won too!

**********


These four are my all time favourite makes:


My favourite pin cushion is always the one I have just finished making ....

the needle case has pockets for tape measure, thread bobbins, pencil, and stitch ripper....

each of my pincushions have been made to go with my travel needle cases of the moment ....
 you can read more here about making this needle case ....

the pincushion attaches with poppers ....

and some pincushions are very hard to photograph....

The next one was made to imitate a needlework basket which was pictured on the fabric of a sewing bag I made... I could show you one day ... if anyone wants to see .....

this one is part of a set ... there is a bag, and a purse ....

 the elastic, around the waist of  the bag, threads through the back of the lid/pincushion, making a wrist-band

again, not easy to photograph the pincushion

I made sure to make copious notes about how I made all these pincushions ... at least I shouldn't have any trouble working out how to make them again!


apologies, but I just couldn't show the pincushions without their needle cases .....


and don't forget to go and visit the "The Perfectly Pleasing Pincushion Parade"...

and I'm off to link up and  visit the other entrants now!

Have a great week! Make sure you take time to do some stitching, even if it is only 10 minutes .... you never know, once you start, you might find you will keep on going!


Bye for now,
Hugs,
Barbara xxx

Friday, September 09, 2016

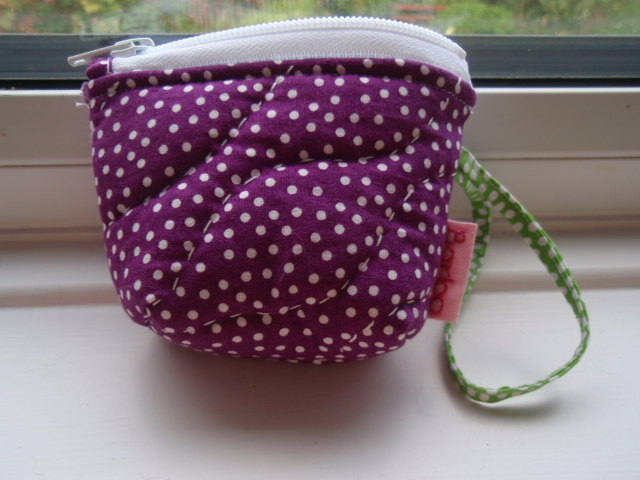
A Very Puffy Pouch

Hello,

I'm so excited to be able to show you my latest finish!

Just to recap for anyone new to my blog: I used a free tutorial from Svetlana of Sotakhandmade, who very clearly said "avoid polyester batting as it's too poofy for these pouches" .... so what did I do???

Well .... I just love puffy pouches!


I mentioned yesterday that I was having problems with my zip! The zipper foot didn't help one iota! And  the seams at either end of the zip were really scant! And I cannot stress this strongly enough .... this was my own fault, because my zip was the wrong length! Oh, one other thing ... I cut my fabric about about an inch bigger all round thinking the quilting would shrink the pieces once quilted! However, I dare say that probably helped .... with fitting the too-long zip!


Ah yes, while I remember .... for those who haven't seen this pouch before .... I coloured in the hearts on the lining fabric and you can read about crayons I used here.


I really enjoyed making my puffy pouch, especially the quilting and colouring in, although it took a little longer to make than I anticipated, mainly due to my using the puffy polyester, and also the zipper being a "tricky little so and so" (it is so reassuring that I am not the only one who struggles with zips! - bourne out by the amusing comments on my previous post).

It was sooooo worth persevering with this pattern, and I am so happy with my "Very Puffy Pouch".

Next time I will try to stick to the pattern ..... tee, hee!

Now, what else can I make before I return to my WIPs?????

See you soon.


Hugs,
Barbara xxx

Linking to:

Crazy Mum Quilts (Finish it up Friday)

Thursday, September 08, 2016

WIPs - Quilted Purse / The Splendid Sampler / My Cocoa Sampler

Hello Dear Reader,

My quilted purse is not going so well! It is all stitched together now, but the zip is just half an inch too long, which has caused a few problems finishing it!


Note to self: Next time attach closing tab to wrong side of zip first, fold with a 1/4 inch hem to front, and machine stitch to finish neatly! Otherwise, zip shortening worked well!


Not quite ready for a final photo! Hopefully it will be finished in a day or so. 


The Splendid Sampler: I am still adding my buttonhole stitching .... a little frogging here as the stitches were bunching on the base ..... but it's nearly finished now!

The Splendid Sampler - Sewing Machine


It's been a while since I mentioned my Cocoa Sampler, you can see updates over at Kitten Stitching and the Friday Frolics. 


This is where I'm up to at the moment.

Thank you Jo and Noni for your comments about DMC changing the colours of their cotton .... so I know now that I hadn't picked up the wrong colours by mistake!

Luckily I found that I had been using the exact colour I needed on my Tatty Teddy WIP, which is all but finished, so I was able to use the remainder for this project.


  • I've stitched quite a lot of the purple heading. It's nice to start seeing a bit more of the final picture.
  • The arch needed frogging where I had used the wrong grey ..... it was much too dark! 


I am so glad I wasn't working on some massive heirloom piece using lots of this grey ...... I would never have dreamt that DMC would change the dyes!


Today I am linking to Eshther's WOW WIP.

Now, I don't know about you, but I'm off to see what others are creating!

Thank you so much for visiting me,  and thank you also all for the wonderful comments you leave me!


I hope you've all managed to get some stitching time this week!

See you next week.

Barbara xx

Sunday, September 04, 2016

Friday with Friends / Five on Friday / Finish it up Friday

Hello Dear Friends,

Firstly, I'm sorry I haven't been commenting much lately, but I made the mistake of changing my password when I wanted to use my email on the laptop, then, that in turn meant, I couldn't get into my emails again on my iPad! (I never considered that this would happen.)

Typing on our oldish laptop (things have improved massively in the past five years) is like a bad dream! I can be typing away, when suddenly the cursor has jumped to somewhere totally unknown! If I am not very careful the laptop will delete whole lines I've just typed ... and, for all I know, it could even publish by itself!! Very scarey!

*********

Anyway, I digress, this Friday I was "stitching with my friends"! I could have joined in with Cheryl's "Friday Night with Friends" but I didn't know I was going to be stitching until it happened, so I stitched alone, but thinking of my blogging friends as I did so!

.... and as it turns out I could even have joined in with Amy's "Five on Friday"! Who would have known? ... I have exactly Five photos!

.... or maybe even Amanda Jean's "Finish it up Friday", albeit rather tenuously!

.... although I didn't actually sign in to any of them, but I was with you all in spirit!

**********

What happened was .... Friday afternoon I read on my friend Jacquie's blog (My Journey) that she had dropped her iPad and the glass screen had shattered. (Since then I've heard Jacquie is fortunately covered by her household insurance!)

I took this as a timely warning, as I have often found the iPad has a tendency to slip through my fingers too, plus, shortly after reading what had happened to Jacquie's iPad, DH told me off for leaving my iPad on the floor next to my chair in our kitchen, where he had almost trodden on it when closing the blinds for the evening, and he feared he would have damaged it (even though it was in a Griffin case!) ... N.B. He is not overweight, and often tells me he is of "athletic build"! and then I had a lightbulb moment! and that evening I dug out an iPad cover which I hadn't been using, and set to, measuring up fabric and wadding for handles, to make a safer way of carrying my iPad around the house.


made the handles, not the cover (that came from a shop) 

In case I want to make handles again, here is how I made them:

Materials:

Fabric - 2 pieces (15" x 3")
Wadding - 4 pieces 15" x 1 1/4"

Method:

For each handle,
  1. I folded the fabric in half, lengthwise, RS tog, and stitched using a 1/4" seam.
  2. Turned the tube through, with RS out. Press gently with a warm iron.
  3. Then took 2 pieces of wadding and threaded them through each tube, keeping the wadding as flat as possible, then topstitched each side of the handles with a 1/4" seam.
  4. Attached both ends of handles, of handle facing top of bag, stitched a 1/4" seam across top of handle
  5. Folded handle upwards covering raw edge. Stitched in place in an oblong shape to secure - see photo below.


Finished!

Probably could have been neater, another time I must remember to cut handles on the bias.


Hopefully I have achieved my objective of making a safer way to carry my iPad around the house, and at the same time, somewhere equally safe to leave it at the end of the day, say, on the arm of the chair when not in use!

This should solve the problem of the iPad slipping through my fingers.


It was nice of you to drop by .... so how many of you are off to make your own iPad case, with handles maybe????


Hugs,
Barbara xxx