Sunday, October 22, 2017

Mini Finishes & Gifted Gorgeousness


Hello Dear Reader,

Today I’m linking to Jo of Serendipitous Stitching with my cross stitch finish. Actually I completed this in the summer but kept missing the linkup for Gifted Gorgeousness.

Gifted Gorgeousness is our opportunity to link up showing gifts we have received or sent, or can shoehorn in  ..... for instance gifts from magazines.

And I am shoehorning this one, as it was a gift
from a cross stitch magazine

My cross stitch friends might remember seeing this before when I was stitching it (that's the white bit in the middle) and might recall me saying how long it took to stitch, for such a small project. There were too many half stitches and the fabric was 16hpi (for non cross stitchers that's 16 stitches to the inch), too small for me. I'm much happier with 14 stitches per inch.


I couldn’t post without showing you these lovely mittens, or should I call them fingerless gloves, my sister made for me earlier this year. These were the first pair she had made ..... wasn’t I lucky! Our Mum has been making lots of these gloves for charity over the last few years and my sis thought it was about time she made some too!


On the stitching front I fully finished off a few tiny projects:


The first being this tissue cover, made last week for a birthday pressie for Mum, using some of my favourite pink check which I normally use to line items, but as Mum has very poor eyesight (Retinitus Pigmosa) I used the pink on the outside so, hopefully, it will be easier for her to find in the depths of any bag. 

For the lining of the tissue holder and the outside of the Mini Thread Catcher (MTC) I used some flowery scraps which I had been gifted by one of the ladies from the handicraft group I attend. Ohh, and the pink MTC is another little gift for Mum.

The tissue holder is still in my possession at the moment because I felt it really needed a little embroidery, and that has taken this week to stitch. 


As I started the post with a yellow photo I thought it would be nice to finish in a similar vein!

And the other MTC will be a future pressie

With three finishes this week, I am also linking to Amanda's "Finish It Up Friday", albeit a little bit late, but I'd hate to change the habit of a lifetime ..... tee,hee!

If you like teeny weeny stitching as much as I do, you really must pop over to Amanda's blog: Crazy Mom Quilts, just to see the incy-est (not sure how to spell that!) pouch she has made. It's such a darling! 

All that said, I hope you will pop over to both Jo's and Amanda's blogs to see what others have made.

Thank you for popping by today.


Hugs,
Barbara xxx


Thursday, October 19, 2017

October 2017 - Catching Up!

This project started with cross stitch in mind ..... but, my search for the perfect stitching kit has taken me away from my cross stitching, for far too long!


The Flashing Scissors
Tee hee! Can you guess what this is?

Traveling on the train with DH recently, my glasses were sitting on the table as I stitched, and DH thought this would make quite a funny picture of ..... and I'm sure you will have guessed ..... another Mini Thread Catcher (MTC)!


It was also a handy way of showing the size.

*********

What's coming up?


  • Some of you have asked me for more details on my book holder (HERE) ..... and I intend to edit the post as soon as I can.
  • Also I've been meaning to start work on a new bag, and, again, will blog about it eventually!
  • However, I really do have the bug for making more Mini Travel Sewing Kits, which of course means making more Mini Thread Catchers.
  • Shortly I'm hoping to share a "Gifted Gorgeousness" post with an update on my cross stitch.


**********


For some time I've been wanting to make a sewing kit that, by attaching a lanyard, could also double as a name badge, and, as I've said before, a sewing kit really needs a Mini Thread Catcher (MTC) (Tutorial HERE).

At the time of writing the MTC tutorial I hadn't taken photos, so hopefully these pictures might be helpful if anyone wants to make one.

Maybe I've got a little bit carried away ..... but they are cute!

The Flashing Scissors
..... I couldn't decide which fabric I liked best.

Did you notice my teeny painting in the background, I was testing colours for one of the Mini Sewing Kits I'm making? Can't show it properly as it is going to be a present ..... the Mini Sewing Kit that is!


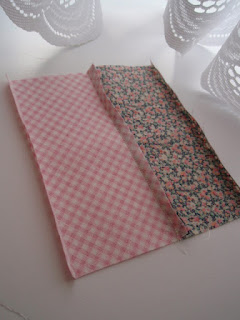
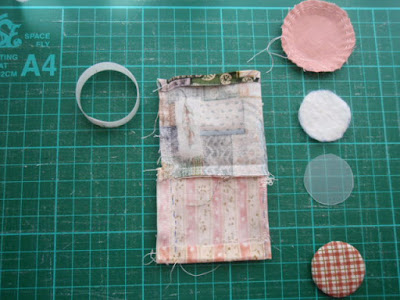
And then I've been working out what size to cut the base ..... for the perfect fit .... it needs to be smaller than the rim so that the MTC will push up and stay closed. Hopefully, all will make sense as you look at the pictures!

The Flashing Scissors
Rim circumference measures 4 1/2"

My rim measured 4 1/2", therefore, allowing for the seams, my two pieces measured 5" x 2 1/2".

Use 1/4" scant seams throughout. Read about scant seams HERE.

It is important to turn a 1/4" hem at this point, top and bottom, and press (with a hot iron) ..... and remember that's a scant seam again, so keep it small. Press the centre seam towards the base (inner fabric) 

The Flashing Scissors
Press centre seam towards lining fabric

Then, pin the short sides to make a tube (Right sides together), and machine another scant seam. 

The Flashing Scissors
Taper the seam slightly towards the hem of the inner fabric,
catching the hems in place.

The Flashing Scissors
I used a wider rim for these later versions.

The Flashing Scissors

Excuse these pictures taken on the train on my lap, but the light is so much better on the train than indoors at home at this time of the year.

The Flashing Scissors

From this point it is all hand stitching.

The Flashing Scissors
This time I attached the puffs individually,
but I think the Mark I  MTC (in the link above) was the quicker method.

The Flashing Scissors
Oops, I guess I should have trimmed this large seam.
The Flashing Scissors
A bit fiddly turning it through.
The Flashing Scissors
The outer fabric needed a row of gathering stitches
and attaching to the inner sussex puff, before
finishing with the outer puff.
The Flashing Scissors
You can see the hand stitching keeping  the rim in place.

Then simply twist the base, and push up into the rim, until it looks like this .....

The Flashing Scissors

Any loose threads will be held inside until you are able to dispose of them, or add them to your TUSAL jar.

The Flashing Scissors
 the base
The Flashing Scissors

To date I've made a total of three MTC's, 


**********


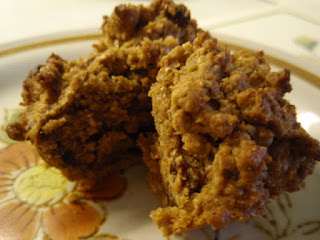
This weekend I was tempted to make some Rock Cakes, using a recipe I've gradually been adjusting over the years, until finally it has become Vegan. 

Don't laugh, but I had intended to have a go at making Super Mom No Cape's recipe for Beer Bread. I made my usual bread only last week and I thought I'd love to try Susan's recipe ..... I'd bought the beer (tee, hee, good excuse for buying the beer, not that I need one really!), bought some Oregano, and Thyme too, but then I wasn't sure I had the right flour. We have lots of different types of bread flour, but not much all purpose flour which the recipe called for, so I decided to use up my old flour on some cakes, and buy fresh for the bread next week.

The Flashing Scissors

Sorry the photos are a little dark as it was a very cloudy day.

The Flashing Scissors

I had to try one as soon as they came out of the oven ..... it was delicious!
 Both DH and I love them with custard too!

Now I'm in the baking mood I hope to try Susan's beer bread later in the week.


*********


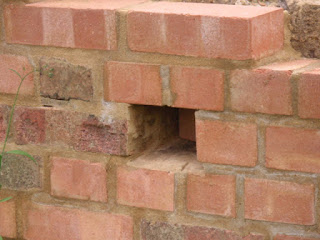
Oh, last week we found out what geocaching is. We were on a guided walk and were shown this hole in a reconstructed wall where a plastic box lives with lots of details inside. The box had been here for years and when the wall was rebuilt its own "home" was included. You would have to know it was there to find it as a brick has to slide out to reveal the box.

The Flashing Scissors


**********


In years gone by we've had sunflowers which have grown from the seeds dropped from our bird feeders, but these days the seed that we buy for birds has the husks removed, meaning the birds spot the seed dropped on the ground, and therefore we rarely get plants springing up under the feeders these days.

So these sunflowers make me really happy! They are just a few of the plants that DH planted specially from seed this year, and they have grown into absolute giants. A couple of them have flowers as big as dinner plates ..... certainly a record in our garden ..... and you should have seen the size of the stem!


The Flashing Scissors
This plant has about five, or six flowers!

The Flashing Scissors
The light wasn't quite right, and I changed the contrast to take this picture ..... I love the effect.

They remind me of the nursery rhyme of Jack and the Beanstalk when I stand next to them, as some of them are over 8 feet tall.

The Flashing Scissors
I love this one ..... looks like a heart in the centre!

We are not sure what to do with the sunflower heads now that they are dying back. We are more than happy to leave them in position for the birds to help themselves, however, has anyone experience in this, and would you suggest harvesting them, and if so how should this be done? Advice please! (It's only a small domestic crop of about a dozen heads, we are not looking for the loan of a combine harvester.)


**********


By the way, if you are looking for some Halloween stitchery, you can find some lovely free vintage embroidery motifs on Super Mom No Cape's blog this week.


*********


Oops, sorry, that's quite a long post, but I hope there was something here to make you smile (in a really nice way, of course!).

I'll try not to leave it so long next time!


Hope you are keeping safe and sound.


Hugs,
Barbara xxx