Today I'm joining in with Gifted Gorgeousness.
Visit Jo of Serendipitous Stitching HERE to see what it is all about.
On my last Gifted Gorgeousness post HERE I teased you with a picture of my then current WIP ..... and today it's finished!
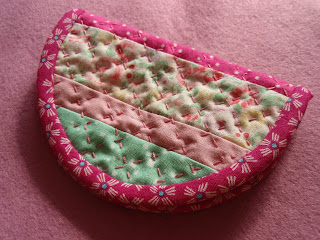
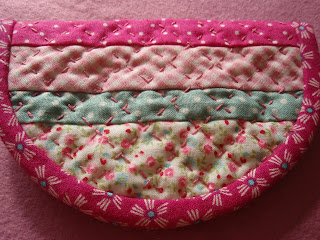
A little needle case that will eventually be a gift for someone. I couldn't resist making ..... such a simple pattern to stitch. OK, I know I didn’t need to do quite so much quilting, but I love those stitches! Tee hee!
I am always hopeful that I might encourage some of my friends to try a little bit of patchwork, and this seemed a small enough project that might possibly piqué their interest.
~~~~~~~~~~
Oh, and I had a lovely surprise at my Handicraft Group recently. I had been admiring a bag one of my friends had made and the next week she very kindly gave me the remaining fabric!
 |
| Annie Downs fabric - I don't have the name |
I know exactly what I'm going to make already!
~~~~~~~~~~
When I was stitching my needle case I thought I ought make myself a tutorial for the next time, as I can never remember how to start and finish, and I can never find a suitable tutorial anywhere!
I've been meaning to do this for soooo long!!!!!
So here's a few notes for binding something tiny.
Binding Tutorial:
I'd just finished quilting ..... I use the sticky tape (decorator's masking tape) to keep my stitching lines straight.
Binding is from stash. Cut on the bias, 2" wide, folded in half and pressed.
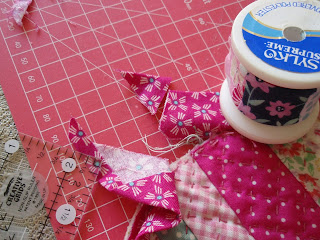
Leave two or three inches free at the beginning. Start on a straight edge, pinning all round (being careful not to stretch binding around curves ..... and this was almost too tightly stretched), finishing back on the straight edge again. Machine in place, ending with two or three inches remaining.
Turn in a quarter inch on the bias cut edge.
Push one end inside the other, as per the following photos:
If the fabric you are pushing into the binding is too bulky, cut some off, but be careful that when the fabric is stitched you don't have any raw edges.
I snip teeny pieces off, and test positioning a few times to be sure it will be right.
Once it sits neatly, machine in place,
use tiny hand stitches along the diagonal join.
Fold binding in, and hand stitch to finish
Stitch popper on. Use thread doubled.
And there we are finished!
If you make one I really do hope you'll let me know!
See you soon.
I have a follow up on my Curry Dye Job to show in a few days because I also want to show you my "Cactus" project on the 30th August! I should have a button for that but I can never remember how to add them ..... tee hee!
Anyway, see you soon!!!
Hugs,
Barbara xxx


19 comments:
Very cute! Thanks for the tutorial.
Another pretty from your clever fingers Barbara - and thank you for the tutorial for the binding. Trying to bind something that small gives me pause for thought so will remember your tute when I need to attempt it.
Hi Barb great post my friend oh i love the new needlecase and thankyou for the tutorial.
Oh you will have fun with your new fabric,how lovely of your friend to give them to you,they are so pretty.
Hope your day is a good one my friend xx
Your needle case is so pretty, Barbara. I love all the pretty quilting you did. Thank you for the tutorial.
That is so cute Barbara, and a tutorial too:) I am always looking for new methods of finishing binding so thanks for sharing yours.
Thank you very much for the tutorial, Barbara !!
I loved it.
Greetings from Spain.
Es precioso tu trabajo y nada se compara con lo hecho a mano, me encanta el patchwork y quiero aprender!!!
Gracias por el tutorial, y gracias por tu visita!!
Besos!!
this is a beautiful needle case, Barbara. I love all your stitching. Thank you for the tutorial :)
Q lindo trabajo. me encanta.
saludos
What a cute little needle case! Lucky you to receive the fabric from your friend.
A great tutorial. Little projects are a bit harder than larger ones. What I love about this case the most is your hand stitched quilting.
xx, Carol
The hand quilting looks great Barbara - on a small item like this it takes no time at all and gives such a lovely puffy finish. xx
Hej Barbara,
what an amazing little pouch! Thank you for the great tutorial. When I have a little bit time should I sew one :0) greetings from denmark, Ulrike :0)
un bonito estuche.
gracias por el tutorial.
saludos
Such a lovely little needlecase. Thank you so much for the tutorial, the way you've finished the bias ends is so neat and tidy
Thanks for taking part in GG this month. The needlebook is lovely and such a good idea to make yourself a tutorial and share it with us all!
Hi Barbara! It's a very pretty needle case. Those little stitches and the patchwork are really nice, thanks for the tutorial, I love this project!!!! Besitos
Such a sweet little case! You make it look do-able, but a I'm not much of a sewer unless it's crosses!
How nice of your friend to give you her fabric, have fun with it.
And now have discovered they exist, I *have* to buy a 2.5” square !!!
Post a Comment