Monday, December 24, 2018

Gifted Gorgeousness - December 2018

Hi there blogging friends!

Christmas is almost here! Hope everyone is ready!

Just popping in with a quick post for Jo’s Gifted Gorgeousness (you can see everyone else's posts over at Jo's HERE).


As it’s almost Christmas there is one more Christmas tune I really love ...... Wizzard! I was especially pleased to find it doesn’t have an advert before the music starts!

Yay I have a finish!

This is quite appropriate for Christmas, in one way ..... because I think this little gift was something I received for Christmas at least 20 years ago!

theflashingscissors.blogspot.co.uk

Do you remember me saying recently that I thought I'd destroyed this piece! 

theflashingscissors.blogspot.co.uk

..... when I cut the fabric too close to the stitching .....

theflashingscissors.blogspot.co.uk

But look, I got lucky! The stitching went well and, surprisingly, the edges didn't fray! Phew!

theflashingscissors.blogspot.co.uk
Now I just don't want anyone to touch ..... the fabric
was just beginning to fray as I finished stitching


And, its almost "Squirrel time"! Tee hee!

As it happens we have a white squirrel visiting us these days:
theflashingscissors.blogspot.co.uk
He's quite elusive and hard to capture on "film"!

theflashingscissors.blogspot.co.uk

theflashingscissors.blogspot.co.uk
Some days he looks better than others! 

So this little piece of stitching falls under the categories of Gifted Gorgeousness because it will be a gift for one of my friends from my handicraft group, it is also one of those squirrel projects ..... one of those projects that makes you drop everything else  until its finished. (I'll be linking this post to Menopausal Melon's DReaMi squirrel party shortly)

This was meant to be a pincushion ..... but I'm not sure I can stop myself  turning it into a teeny tiny bag to hold a pincushion!

theflashingscissors.blogspot.co.uk
The skinny pinnie is just posing here,
there will be a specially made pincushion
for this little bag

This little bag (or pincushion) is probably smaller than you would think looking at my photos! It finishes at 9 cms tall, 13 cms if you include the handles and 7 cms wide (3 1/2", 5" and 3" approx).


theflashingscissors.blogspot.co.uk


theflashingscissors.blogspot.co.uk

theflashingscissors.blogspot.co.uk


Shame my sewing machine has just died ..... all further sewing will have to be by hand!


I seem to be in Pincushion making mode just lately, which is probably why I'm joining in with Bea's pincushion swap over at "Beaquilter".

Perhaps you'd like to join in? Not sure when the closing date is but you can read all about it Here.


Must go, duties to do!


Have a Super Christmas all, and I hope to "see" you again in the New Year.

Thank you for popping by, and thank you so much if you are leaving a comment too!


Many Hugs,
Barbara xxx

Sunday, December 16, 2018

Advent Post 2018

Hello Dear Reader,

So happy you could join me today for day 16 on Jo's Advent Calendar. You can see all the calendar over at Jo's HERE, but don't forget to come back and comment here, tee hee!


Wednesday, November 21, 2018

Gifted Gorgeousness & TUSAL - November/October

"GIFTED GORGEOUSNESS" is a monthly link party run by the wonderful Jo of Serendipitous Stitching, where we post about stitching gifts we have received or given, or indeed anything related to the word "gift". Link runs from the 15th until the end of the month. If you would like to find out more and maybe join up go HERE!

I was so busy in October ..... I completely ran out of time and missed posting. I was trying to complete my Improv quilt: “Portrait of a Polka Dot Lady”, for a 1st November reveal ..... I’ve never attempted Improv before, and found I’m too precise for this method, but I will finish her ..... soonish!

***********

Gifted Gorgeousness and TUSAL - November

Yay! I had a finish for Halloween/Fall!
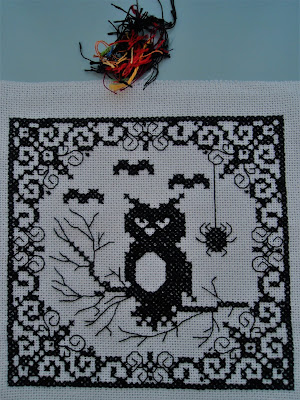
I stitched this little owl, a freebie I'd seen over at Rhona's blog (with a link to the free pattern). Nice to stitch in only one colour, although a teeny bit hard on the eyes. I haven't quite decided how to fully finish off though!

Theflashingscissors.blogspot.co.uk

Not a very bright photo I'm afraid ..... the little specks of colour in my ORTS (above the owl) have mostly come from the Christmas stitching that I started as soon as I got the latest copy of CrossStitcher home! (not affiliated by the way!) 

Theflashingscissors.blogspot.co.uk
Oh, and the bits of yellow cotton came
from the little fob I made for my malore Mellor.

This next project is not a gift, well, not yet anyway!

After finishing the owl I went back to a little bit of embroidery I started w-a-y back ..... which will be a purse some day. I think I had boro stitching in mind, or something like that. I'm hoping the raw edges won't fray too much!

Theflashingscissors.blogspot.co.uk

Using some of my scraps.

Since I started writing this post my Christmas stitching has progressed somewhat (and now even more so, but no more photos at the moment!).

Theflashingscissors.blogspot.co.uk
Free gift from CrossStitcher issue 338
- Mrs Christmas

There was a second gift which can be ordered via CrossStitcher! A sample of DMC's new Étoile thread, with Aida (Antique White 10 x 8"), a pattern, and a size 24 tapestry needle, which then arrived within a couple of days. (Just pay postage - offer runs to 4 Dec or when stocks run out)

Yesterday I was reading a review of Étoile on Mary Corbet's blog, and this evening I started stitching this piece.

Étoile is a sparkly thread, looking slightly woolly, the strands appeared thinner than normal DMC but covered the fabric well, IMHO.

I thought the thread would catch on my fingers but so far I have managed to stitch without any catches or tangles.  I'd say my thread stitched in a similar way to ordinary stranded cotton.

It seems good so far to me! I'd say I like it!

Theflashingscissors.blogspot.co.uk

For this stitching I used 2 strands, cut shorter than usual at approximately 12" long.

Gifted Gorgeousness and TUSAL - October

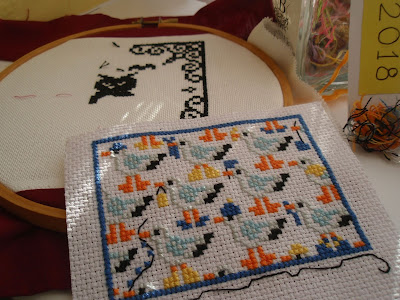
And, Yay! A finish last month too, Seagulls and Stripes, but not FFO!

Theflashingscissors.blogspot.co.uk
This was a freebie from CrossStitcher 332

Oh and then I was working on my Elizabethan Nosegay too (which is a gift I received some years back) but you can find out what happened with this one over at Kitten Stitching and the Friday Frolics.

Theflashingscissors.blogspot.co.uk

Theflashingscissors.blogspot.co.uk


Thank you all for your lovely comments! Especially Gwen (of Texas Ranger) for her suggestions for my Polka Dot Lady art quilt. I haven't had a chance to use the sewing machine lately but I hope to get back to that very soon.

I hope you are keeping well and managing to find time to do lots of stitching!!!


Hugs,
Barbara xxx


Tuesday, November 06, 2018

Improv Quilting - Portrait of a Polka Dot Lady

For those who may not know

Until this month I was a member of  "The Endeavourers" (see button in RH side bar for link). The aim of the group is to make an art quilt to fit the chosen subject for the quarter over those three months and then to show the quilt on "The Endeavourers" blog at a given date. I am now leaving the group as I  find I don't have as much free time as I thought I would have in order to be able to complete a quilt within that timescale.


~~~~~~~~~~

IMPROV


I was so excited when I read that the November reveal for The Endeavourers was to be “Improv”!

I didn't really know much about Improv then but, of course, I've searched the internet widely to read more.

I found out more about Improv HERE, and somewhere I read that Improv is basically made without a pattern and I was especially encouraged when I read that "if you think what you are doing is Improv, it is!"

So, one day I was reading a blog where the lady showed how to stitch Improv circles ..... I had to go out for some reason, and when I returned I hadn't bookmarked the lady's blog, so now I cannot find her to share the details with you here (sorry for being an idiot!).

Anyway, this gave me the idea to make a quilt with a picture of my "Polka Dot Lady" in it! However, as you might guess, this was waaaay harder than I ever imagined!

This is how she looks so far!


I started with a rough sketch of how I imagined she might look, and other ideas of what I could add to the quilt:

I soon realised this was all too much and decided to concentrate on "my lady", and then debated where to start!!!

So ..... I started with her hair buns:

I actually sketched the buns on the pink polka dot fabric, just eyeballing the sketch to see if I could envisage the completed size. Then placed the first "bun" on a strip of background fabric. It was very complicated ..... I was afraid of cutting the wrong size ..... so there was lots of sketching ..... using my rotary cutter for all cutting .....


And then the difficulty of how to stitch them in place .....


Pulling the raw edges together and stitching very slowly .....


Not too bad for a first attempt!


It even looked quite good on the right side too!


After stitching the second "bun" and guessing their positioning .....


Lots of sketching to work out how big to cut her hair .....


I stitched her hair in place in much the same way that her hair had been stitched on my "Polka Dot Lady" pincushion ..... with a raw edge, and machine stitched in place, as decoratively as I could.

I didn't take photos of making her shoulders, but basically I cut out a cardboard template ..... starting with an oblong about the size I wanted, worked out the curve of her shoulders and cut out the shape I thought her neck should be, then cut the fabric from that shape.

I machine stitched the neckline to her dress in the same manner as the "buns" .....


Maybe this is too many photos, sorry!


Then I realised the neck would be too tricky to machine stitch, so this little part will be hand stitched.


Anyhow, I placed the shape over the background and, using my trusty Flexion pen (no affiliation I just find this is what works for me), which irons off with heat, drew the shape to cut out. 

To be more precise, starting with the outer line - 
  1. actual shape of the Polka Dot Lady piece,
  2. stitching line,
  3. cutting line.


I started with the body ...... machining it in place ..... next from the top of the head, stitching round to the neck, and then started again on the second side in the same way.


And here she is with the lines all ironed out.  The right side of her neck is fully stitched but the left is a little trickier to stitch. I might undo the left side of the body as it doesn't really sit right in the background.


So, hopefully you can see why I've been a bit slow with this one ..... it was soooo much trickier than I ever imagined!

There will be borders, maybe a star or two, oh, and there's my lady's face to embroider, but the finished piece will only be 15 inches square when finished, and hopefully it can be considered a little bit "Arty"?! But I can't say how soon it will be finished.

As I said at the beginning ..... I was a member of "The Endeavourers" but I am parting with them now, however I will be popping back to visit as there is so much wonderful inspiration among the lovely ladies there. I wish I could continue, but I just don't work that fast!!

So do pop over to visit them if you have a moment.


~~~~~~~~~~

I will be back here soon with more of my tiny stitching projects!
(Oh, and let me know if you have any questions on the method used for my mini quilt.)

~~~~~~~~~~

Wishing my "Endeavourer" friends all the best, for future quilts,


Hugs,
Barbara xxx

P.S. I think my commenting problems are all solved, thanks to Catherine ..... and hopefully next time I can tell you more, in case the same happens to you!

Sunday, October 07, 2018

Polka Dot Lady and a Well Dressed Cotton Reel

Hello Dear Reader,

I’ve been itching to finish this little lady so that I can share pictures, but it was slow stitching because I’ve been worrying for a while about being unable to comment on most Blogger blogs, and trying to find out what had caused the problem! Thank you to those of you who helped me finding a way to comment! 

Oh, the glitch has since disappeared, but because of my experience I have now changed to a Pop Up Window on my own blog ..... just in case what happened to me happens to you, and you are only able to comment on Pop Up Windows! 

Hope this doesn't cause you any problems.


But back to my Polka Dot lady ..... who was yet another impulse make!


TheFlashingScissors.blogspot.co.uk


I’d been looking at Pinterest and spotted a pin for “Dolly Pincushion” by Magdalena Franco ..... you will find the tutorial HERE. (You will find Magdalena's dolly has a different face ..... I had to play the hard way and embroider proper eyes, although they are really far too far apart!)

As soon as I saw her I wanted to start stitching, and eagerly downloaded the pattern, chose my fabrics, and started cutting. In case you want to make one I would say be ultra careful about seams. If the seam isn't quite right ..... it will show, so stitch very slowly and carefully!

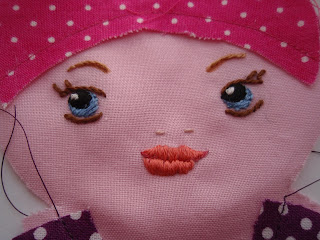
Of course I realised I'd made a mistake as I started embroidering ..... I should have cut a larger piece of fabric for her face, so that it would fit in an embroidery frame! Luckily I do have one teeny embroidery frame in which I managed to keep the fabric while I worked out how to embroider a face. Her eyes and lips were satin stitch ..... a sort of stem stitch for her eyebrows ..... and a couple of short stitches gave her the allusion of a nose!

She took quite a while to finish. I found the stuffing hard to do! I showed a photo of her on my last post, then afterwards I took out most of the stuffing ...... her face wasn't quite right! She was stuffed with polyester toy filling and rice. I found her hard to finish ..... trying to keep the stuffing in and stitch the base closed. I added a piece of plastic in the base to hold the rice in place. That helped quite a lot!

She was well worth the effort, and I'd definitely make her again in an instant, but I don't think DH would like another one around the house! Tee hee!


-----------


While I was making the Polka Dot Lady I got slightly distracted with a DrEAMi moment! One of those moments when you just have to drop everything and make it! Oops, I missed the link up, but I wanted to let see any way!

You see the "cotton reel" in the picture? I know, its plastic! And all the time it had thread on it I just hated it, couldn't wait to finish it and throw it away! You know what? The minute I finished it I couldn't part with it! After all, it is a vintage reel, bought in the 80's, probably!

I found it was very good for popping my scissors in, then when I'm stitching my cross stitch ..... well any stitching really ..... it's easier to pick up the scissors!

Sooo, then I started thinking pockets and things, for the cotton reel ..... or a pincushion maybe!

And one thing lead to another! And using the same method as the Coffee Koozie, I made a "jacket" for my cotton reel, madness I know!!!

All it needed was a popper to complete my Well Dressed Cotton Reel!

The jacket will be handy for "resting" needles too.

TheFlashingScissors.blogspot.co.uk


And here are both my finishes, once again!

TheFlashingScissors.blogspot.co.uk


Tee hee! Hope you enjoyed popping by! Come back soon to see what else "I just had to make"!

Oh, and have you had problems commenting lately?

Oops, late Linking to Amanda Jean's "Crazy Mom Quilts"


Hugs,
Barbara xxx

Sunday, September 23, 2018

Slow Sunday Stitching

Hi Kathy, and blogging friends,


I was just passing by, hadn't intended to say hello, but I couldn't resist!

No embroidery, but I am using tiny hand stitches to complete my polka dot lady.

TheFlashingScissors.blogspot.co.uk
Don't forget, click on any photo to get a bigger picture!

There is a close up of her embroidered face here and, of course, if you are seeing the full web picture of my blog today she's in the header too. (Once she's finished I'll write a full post and give you all the details of where the pattern came from, if you're interested.)


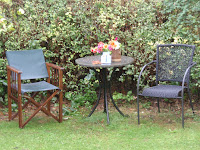
Kathy asked what the weather was like, and if we are stitching outdoors ..... afraid not, not here! This is my preferred outdoor stitching area:

TheFlashingScissors.blogspot.co.uk

and my second choice, depending on where the sun is ....

TheFlashingScissors.blogspot.co.uk

Boy is it raining now! I heard on the radio that it had been a very windy night, but I didn't hear a sound, I must have slept heavily!

Oh, and you wouldn't believe it DH and a neighbour are out walking in it ..... there was a pre-booked guided walk they didn't want to miss! They are each wearing double layers of waterproofs. Poor things!

Our dear furbabies aren't too happy ..... rainy day routine! (Oops couldn't get a picture of our other cat, he doesn't show up very well being totally black!

TheFlashingScissors.blogspot.co.uk


So that's all from me, but I'm wondering ..... what are you stitching .....and are you stitching outdoors?

Looking forward to hearing from you.


And a really BIG "thank you" to all who commented on my last post!


Hugs,
Barbara xxx
Linking to Kathy's Slow Sunday Stitching

Saturday, September 22, 2018

Gifted Gorgeousness - September and a RAK

Hello Dear Readers

"GIFTED GORGEOUSNESS" is a monthly link party run by the wonderful Jo of Serendipitous Stitching, where we post about stitching gifts we have received or given, or indeed anything related to the word "gift". Link runs from the 15th until the end of the month. If you would like to find out more and maybe join up go HERE!

Read all about who's joining in with the September GG HERE (on Jo's blog).

TheFlashingScissors.blogspot.co.uk
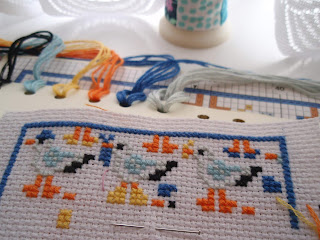
Seagulls and Stripes from CrossStitcher Issue 332

This free kit came from CrossStitcher magazine, actually the same magazine that "Camper Van" came from ..... so the magazine was really good value. The fabric isn't great though, and the needle catches a little bit, and it's hard to put the needle through the fabric actually through the fabric holes...... that said, I think it's a cute stitch and I'm looking forward to being able to hang the sachet on one of our bathroom cupboard doors ..... the doors open very close to wall tiles and I'm so afraid the tiles will be damaged! I just hope I haven't started stitching too close to the top of the fabric! So this is a gift for our bathroom!

~~~~~~~~~~

RAK (Random Act of Kindness)

And this next one is a teeny gift for a non-blogging friend who wanted a way of carrying her front door key when she is gardening ..... in her front garden ..... so that she doesn't have to put the key down anywhere. She wanted some way of secreting her key about her person. She was talking of a "Dorothy bag" ..... so I thought I'd make this ..... and hopefully she might like it!

I am going to add a badge pin to the back so that she can clip it to whatever top she is wearing at the time, or maybe a couple of poppers so that she can attach it to her bra strap, not quite sure yet.

The little purple felt bag on the right slips inside the drawstring bag for extra security (and to stop the key pushing through the fabric).


TheFlashingScissors.blogspot.co.uk
Finishes at: 3 1/4" x 2 1/2" ( 8.5 x 6 cm) approx.

Someone commented about all my dotty fabric the other day, and tee hee there's more polka dot fabric here again!

TheFlashingScissors.blogspot.co.uk

~~~~~~~~~

And for those who saw my little "polka dot lady" on my last past, here is an update on how she is progressing ..... which is ..... very slowly. 

When she is complete I will give you a little more detail about her. Oh, she's not a gift (well, not at the moment)

TheFlashingScissors.blogspot.co.uk


I hope you are all keeping well and that the stitching bug is with you!

Now, I'm off to visit the link party, see you there!


Hugs,
Barbara xxx

Sunday, September 16, 2018

TUSAL - September

Hello Dear Blogging Friends,

I'm linking to Daffycat's blog for this month's TUSAL report. 

TUSAL is where we show pictures of our ORTs (leftover threads), for no particular reason (other than that they look kind of pretty)!

I’m also linking to Kathy’s Quilts for Slow Stitch Sunday here.

Today I’ve been stitching the second free gift from CrossStitcher (Summer Issue) No: 332 - Seagulls & Stripes ..... although I don’t have an up to date photo, this is last week’s stitching ..... I will have another photo to share on my next post (Gifted Gorgeousness), probably tomorrow.

The Flashing Scissors.blogspot.co.uk

 I’ve also been trying to finish this little lady ..... but as I’m stitching the face differently to the tutorial it’s taken me a while to decide what stitches to use.

The Flashing Scissors.blogspot.co.uk
  August’s ORTS - fabric and cotton next to new pincushion in progress.
she’s from a tutorial I found on Pinterest but I’ll have to give you the details on my next post as I don’t have them to hand at the moment!


See you soon,
Hugs,
Barbara xx

Thursday, August 30, 2018

A DrEAmi Finish! Coffee Koozie

Hi everyone,

Thank you all for the lovely comments on my last post, I really appreciate them!

Today is all about my Coffee Koozie! This is my DrEAmi (Drop Everything and Make It) project which I will be linking to Sandra's DrEAMi party! And as it is a finish I will also be linking to Crazy Mom Quilts on Friday for Finish it up Friday.

The Flashing Scissors . blogspot. co.uk

But first of all, just to let you know, I'm still working on my CV bag (Camper Van)

The Flashing Scissors . blogspot. co.uk

..... oooh! I nearly forgot to say, I am making this from a tutorial “Just a little Purse” which I found on Pinterest from SewMamaSew, but, like you do, I am changing a few things slightly as I'm making it.

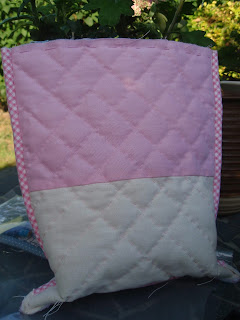
One of those changes being the lining. "Don't do this at home!" as they used to say on some programme on TV ..... was it Blue Peter? well, maybe not! But anyway, I put my front and back together, stitched them, bound the edges and then decided I had to quilt the inside as well as the back of the bag .....

The Flashing Scissors . blogspot. co.uk

it wasn't easy! I had to have one hand inside the bag to make sure the stitches didn't go through to the back (front actually!).

The Flashing Scissors . blogspot. co.uk
I decided to quilt the inside because the lining sagged
once the bag was turned through.
The Flashing Scissors . blogspot. co.uk
I only quilted the middle, it didn't really
need quilting all over.
The Flashing Scissors . blogspot. co.uk

..... but I got totally distracted when I visited Patty's blog and saw her Coffee Koozie! Patty has a link to the tutorial! (Mind, if you go to visit her right now, don't forget to come back!) 

Anyway, I couldn't resist making one, could I?! 

Well it all started with the idea that the squares could be "leaders and enders" while I stitched my CV bag .....

The Flashing Scissors . blogspot. co.uk

Edited 31.08.18:  Adding the binding: 
The Flashing Scissors . blogspot. co.uk
I was really happy with the finish of the binding,
bit hard to see maybe, but it's gone really well.

but, once I got as far as stitching the blocks together this was where my Coffee Koozie  became my DrEAmi project which I just had to carry on and finish!

The Flashing Scissors . blogspot. co.uk

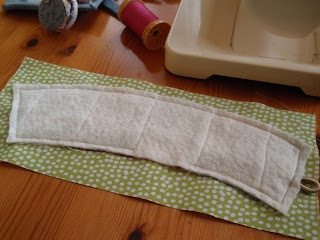
Made using the "Quilt as you go" method (see it on the tutorial).

The Flashing Scissors . blogspot. co.uk

The Flashing Scissors . blogspot. co.uk

Everything went swimmingly ..... until I started "top stitching" .....

The Flashing Scissors . blogspot. co.uk
Disaster struck big time!

I machine stitched all the way round but wasn't happy with the way the stitching looked and had to pull all the stitches out, which was tricky because when my machine had hit the joining seams they had gone from size 4 to 0 .... it was almost impossible to get that lovely pink thread undone.

Anyway, I eventually finished the Coffee Koozie, replacing the machine top stitching with hand stitching.

The Flashing Scissors . blogspot. co.uk


The Flashing Scissors . blogspot. co.uk
Don't you just love that apple green lining ..... ?


Soooo ...... this does mean my poor CV bag is still waiting to be FFO (Fully finished off)!

The Flashing Scissors . blogspot. co.uk

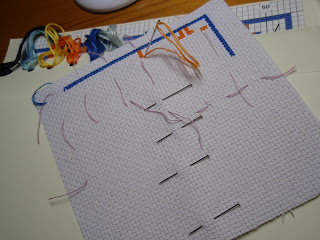
Oh, and this is my latest little cross stitch kit ..... just started. More about the details next time. 

The Flashing Scissors . blogspot. co.uk

The Flashing Scissors . blogspot. co.uk

and no doubt you can tell ..... I can't decide which method to use to keep my place!


 Anyway, you can see I still have plenty of stitching to amuse me!


Hope you are all keeping well! I'm off to try to catch up on visiting all you guys now!

See you soon!!!


Hugs,
Barbara xxx


Linking to: Sandra's DrEAMi party
and            Crazy Mom Quilts for Finish it up Friday


P.S. Sorry guys, that header is a bit big, I'll try to find something smaller next time!